Demo程序
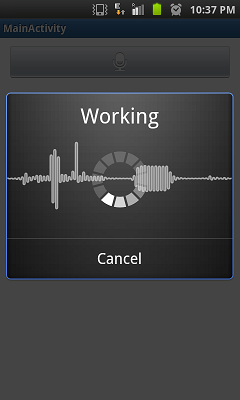
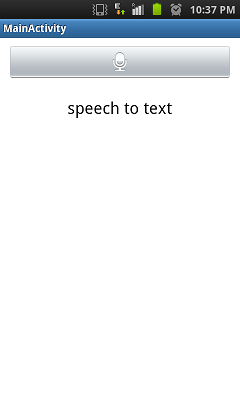
这个程序很简单。他有一个Mic符号按钮。点击之后我们触发Android的Speech To Text意图(Intent)显示一个对话框来接收语音输入。输入的语音然后会被转换成文本并显示到一个text view中。
第一步:在Eclipse中创建基本的Android项目
在Eclipse中创建一个Hello World Android项目。打开 New > Project > Android Project,项目名填 SpeechToTextDemo,选择Android运行时2.1或sdk7。我给定了包名:net.viralpatel.android.speechtotextdemo
做完上面的步骤,你就有了一个基本的Android Hello World程序
第二步:更改布局
在我们的demo中布局很简单。只有一个图像按钮来触发Speech to Text API和一个TextView来显示从语音转换过来的文本。
打开layout/main.xml并替换为下面的内容:
File: res/layout/main.xml
01 |
<LinearLayout xmlns:android="http://schemas.android.com/apk/res/android"
|
02 |
xmlns:tools="http://schemas.android.com/tools"
|
03 |
android:layout_width="fill_parent"
|
04 |
android:layout_height="wrap_content"
|
05 |
android:layout_above="@+id/textView1"
|
06 |
android:layout_toLeftOf="@+id/textView1"
|
07 |
android:gravity="center"
|
08 |
android:orientation="vertical" >
|
09 |
|
10 |
<ImageButton
|
11 |
android:id="@+id/btnSpeak"
|
12 |
android:layout_width="fill_parent"
|
13 |
android:layout_height="wrap_content"
|
14 |
android:layout_margin="10dp"
|
15 |
android:layout_marginRight="10dp"
|
16 |
android:layout_marginTop="10dp"
|
17 |
android:contentDescription="@string/speak"
|
18 |
android:src="<a href="http://my.oschina.net/asia" class="referer"target="_blank">@android</a> :drawable/ic_btn_speak_now" />
|
19 |
|
20 |
<TextView
|
21 |
android:id="@+id/txtText"
|
22 |
android:layout_width="wrap_content"
|
23 |
android:layout_height="wrap_content"
|
24 |
android:layout_marginLeft="10dp"
|
25 |
android:layout_marginRight="10dp"
|
26 |
android:layout_marginTop="10dp"
|
27 |
android:textAppearance="?android:attr/textAppearanceLarge" />
|
28 |
|
29 |
</LinearLayout>
|
第三步:触发Speech to Text API的Android Java代码
打开SpeechToTextDemoActivity 类并替换为下面的代码:
File: SpeechToTextDemoActivity.java
01 |
package net.viralpatel.android.speechtotextdemo;
|
02 |
|
03 |
import java.util.ArrayList;
|
04 |
|
05 |
import android.app.Activity;
|
06 |
import android.content.ActivityNotFoundException;
|
07 |
import android.content.Intent;
|
08 |
import android.os.Bundle;
|
09 |
import android.speech.RecognizerIntent;
|
10 |
import android.view.Menu;
|
11 |
import android.view.View;
|
12 |
import android.widget.ImageButton;
|
13 |
import android.widget.TextView;
|
14 |
import android.widget.Toast;
|
15 |
|
16 |
public class MainActivity extends Activity {
|
17 |
|
18 |
protected static final int RESULT_SPEECH = 1;
|
19 |
|
20 |
private ImageButton btnSpeak;
|
21 |
private TextView txtText;
|
22 |
|
23 |
@Override
|
24 |
public void onCreate(Bundle savedInstanceState) {
|
25 |
super.onCreate(savedInstanceState);
|
26 |
setContentView(R.layout.activity_main);
|
27 |
|
28 |
txtText = (TextView) findViewById(R.id.txtText);
|
29 |
|
30 |
btnSpeak = (ImageButton) findViewById(R.id.btnSpeak);
|
31 |
|
32 |
btnSpeak.setOnClickListener(new View.OnClickListener() {
|
33 |
|
34 |
@Override
|
35 |
public void onClick(View v) {
|
36 |
|
37 |
Intent intent = new Intent(
|
38 |
RecognizerIntent.ACTION_RECOGNIZE_SPEECH);
|
39 |
|
40 |
intent.putExtra(RecognizerIntent.EXTRA_LANGUAGE_MODEL, "en-US");
|
41 |
|
42 |
try {
|
43 |
startActivityForResult(intent, RESULT_SPEECH);
|
44 |
txtText.setText("");
|
45 |
} catch (ActivityNotFoundException a) {
|
46 |
Toast t = Toast.makeText(getApplicationContext(),
|
47 |
"Opps! Your device doesn\'t support Speech to Text",
|
48 |
Toast.LENGTH_SHORT);
|
49 |
t.show();
|
50 |
}
|
51 |
}
|
52 |
});
|
53 |
|
54 |
}
|
55 |
|
56 |
@Override
|
57 |
public boolean onCreateOptionsMenu(Menu menu) {
|
58 |
getMenuInflater().inflate(R.menu.activity_main, menu);
|
59 |
return true;
|
60 |
}
|
61 |
|
62 |
@Override
|
63 |
protected void onActivityResult(int requestCode, int resultCode, Intent data) {
|
64 |
super.onActivityResult(requestCode, resultCode, data);
|
65 |
|
66 |
switch (requestCode) {
|
67 |
case RESULT_SPEECH: {
|
68 |
if (resultCode == RESULT_OK && null != data) {
|
69 |
|
70 |
ArrayList<String> text = data
|
71 |
.getStringArrayListExtra(RecognizerIntent.EXTRA_RESULTS);
|
72 |
|
73 |
txtText.setText(text.get(0));
|
74 |
}
|
75 |
break;
|
76 |
}
|
77 |
|
78 |
}
|
79 |
}
|
80 |
} |
Android Speech to text Android API的核心是包 android.speech和类android.speech.RecognizerIntent。我们触发一个意图(android.speech.RecognizerIntent)显示对话框来识别语音输入,这个Activity转换语音为文本并把结果传回我们正在调用的Activity。当我们调用android.speech.RecognizerIntent意图时,必须使用 startActivityForResult()来接听文本结果。
注意在上面的代码中我们是怎样创建并触发意图intent android.speech.RecognizerIntent的,同时使用.putExtra()方法添加了一个参数。调用RecognizerIntent时,必须提供RecognizerIntent.EXTRA_LANGUAGE_MODE,在这里我们设置为 en-US。
由于我们的RecognizerIntent通过startActivityForResult()触发,我们重写了 onActivityResult(int requestCode, int resultCode, Intent data)方法来处理结果数据。RecognizerIntent会把语音转换为文本并把结果通过键RecognizerIntent.EXTRA_RESULTS作为ArrayList传回来。只有RESULT_OK返回时才会出现。我们只需要使用 txtText.setText()把从结果中拿到的文本设置到text view texText中。
在这里值得注意的一件事是在不支持speech to text API的设备/Android版本中应该怎样处理。在这种情况下,当我们视图启动Activity时ActivityNotFoundException异常会被抛出。在上面的例子中,我们捕获了这个异常并使用Toast显示了一个提示信息“Opps! Your device doesn’t support Speech to Text”。
Android应用程序的屏幕截图
到这里就结束了! 在Android模拟器或真实设备上执行应用程序,将会看到下面的输出。