###sample:
https://www.bbsmax.com/A/A7zgx2ZoJ4/
使用python+django+twistd 开发自己的操作和维护系统的一个
许多开源操作系统和维护系统,例nagios、zabbix、cati等等,但是,当他们得到的时间自己的个性化操作和维护需求,始终无力!
最近的一项研究python。因此,我们认为python+django+twisted要定制一个完全个性化的操作和维护系统。
有几个基本的功能:监控、分析、报警、更甚者直接依据分析的结果进行反应操作。而以上几点通过上述的框架能够比較easy的实现。
以下上图说明:
使用freemind整理了下思路:
以下是一些代码段,完整的代码下载见文档底部:
Server:
- #!/usr/bin/env python
- #coding:utf-8
- __author__ = \'dwj\'
- from twisted.internet.protocol import ServerFactory
- from twisted.protocols import basic
- import cx_Oracle
- from twisted.application import service, internet
- class Mornitor_Protocol(basic.LineReceiver):
- def __init__(self):
- #
- _oracle_conn=cx_Oracle.connect(\'xxxx\', \'xxxx\', \'192.168.7.17/test\', threaded=True)
- _oracle_conn.autocommit = True
- self.cur = _oracle_conn.cursor()
- self._oracle_conn=_oracle_conn
- def ruku(self, line):
- ip=self.transport.getPeer().host
- #获取clientIP
- line=line.split(\':::\')
- #使用:::切割原始数据
- if line[1] in [\'cpu\', \'mem\', \'disk\', \'tcp\', \'net\', \'process_down\']:
- #依据数据包头来确定使用insert还是update。当是tcp包头的时候插入,其余的更新
- if line[1] == \'tcp\':
- sql = "insert into MORNITOR_BASICINFO (ipadd,time,tcp) values (\\'%s\\',\\'%s\\',\\'%s\\')"%(ip,line[0],line[3])
- print sql
- self.cur.execute(sql)
- else:
- line_again = line[3].split(\'::\')
- sql = \'update MORNITOR_BASICINFO set %s=\\'%s\\',%s=\\'%s\\' where ipadd=\\'%s\\' and time=\\'%s\\'\'%(line[1],line_again[0],line[2],line_again[1],ip,line[0])
- print sql
- self.cur.execute(sql)
- def connectionMade(self):
- print \'Connected!\'
- def lineReceived(self, line):
- print line
- self.ruku(line)
- #接受到数据之后运行入库操作。
- def connectionLost(self, reason=\'connectionDone\'):
- self._oracle_conn.close()
- print \'The db is close... ok!\'
- class Mornitor_Factory(ServerFactory):
- #还没想好要初始化什么
- def __init__(self,service):
- self.service = service
- protocol = Mornitor_Protocol
- class Fish_Service(service.Service):
- def __init__(self):
- pass
- def startService(self):
- service.Service.startService(self) #什么都不做,開始服务
- # def stopService(self):
- # return self._port.stopListening()
- #配置參数
- port = 10000
- iface = \'127.0.0.1\'
- top_server = service.MultiService() #定义服务容器
- fish_server = Fish_Service() #实例化我们的服务
- fish_server.setServiceParent(top_server) #把自己定义的服务增加到服务容器
- factory = Mornitor_Factory(Fish_Service) #工厂化服务
- tcp_server = internet.TCPServer(port, factory, interface=iface) #定义tcp服务
- tcp_server.setServiceParent(top_server) #把tcp服务增加到服务容器
- application = service.Application(\'Fish_Service\') #给应用起个名字
- top_server.setServiceParent(application) #把服务容器丢到应用中去
Client端
- from twisted.protocols import basic
- from twisted.internet import protocol, defer, task
- import Get_basic_info_2 as Huoqu
- import guardian as shouhu
- import time
- from twisted.application import service, internet
- class Monitor_Protocol(basic.LineReceiver):
- #自定义客户端和服务端的连接协议。从basic的line继承
- def __init__(self):
- #
- pass
- @staticmethod
- def huoqu_shuju():
- #定义一个函数获取本机的一些状态
- now = str(time.strftime(\'%Y-%m-%d %H:%M:%S\'))
- def add_tag(source, tag1, tag2 = \'none\'):
- #定义格式化字符串函数
- return \':::\'.join([now, tag1, tag2, source])
- #使用:::分隔时间、简单信息、具体信息、原始信息
- tcp = add_tag(Huoqu.net_tcp(), \'tcp\')
- cpu = add_tag(Huoqu.cpu(), \'cpu\', \'cpu_detail\')
- mem = add_tag(Huoqu.mem(), \'mem\', \'mem_detail\')
- disk = add_tag(Huoqu.disk_usage(), \'disk\', \'disk_detail\')
- net = add_tag(Huoqu.net_rate(), \'net\', \'net_detail\')
- process = add_tag(shouhu.check_alive(), \'process_down\', \'process_alived\')
- result = (tcp, cpu, mem, disk, net, process, )
- d = defer.Deferred()
- #使用defered返回结果
- d.callback(result)
- return d
- def xunhuan(self, list):
- #定义循环发送函数
- for i in list:
- self.sendLine(i)
- def fasong(self):
- #定义程序执行顺序,取得信息后用callback交给发送函数发送
- self.huoqu_shuju().addCallback(self.xunhuan)
- def loop(self):
- #使用twist内置的循环函数定义几秒监控数据传送到服务端
- l = task.LoopingCall(self.fasong)
- l.start(1)
- def connectionMade(self):
- #覆盖协议的connectmade函数。定义于服务端的连接建立后開始循环
- print \'Connected!......ok!\'
- self.loop()
- def lineReceived(self, line):
- #必须覆盖接受函数,否则twist会报not importent错误!
- pass
- class Moinitor_client_factory(protocol.ReconnectingClientFactory):
- def __init__(self, service):
- #还没想要要写什么
- self.service = service
- protocol = Monitor_Protocol
- class Client_Service(service.Service):
- def __init__(self):
- pass
- def startService(self):
- service.Service.startService(self)
- #配置文件開始
- port = 10000
- host = \'127.0.0.1\'
- #守护进程
- top_service = service.MultiService() #定义服务容器
- client_service = Client_Service() #实例化服务类
- client_service.setServiceParent(top_service) #把自定义的服务丢到服务容器中
- factory = Moinitor_client_factory(client_service) #定义服务工厂化
- tcp_service = internet.TCPClient(host, port, factory) #定义tcp连接的服务
- tcp_service.setServiceParent(top_service) #把tcp服务丢到服务容器中去
- application = service.Application(\'Fish_Service\') #定义应用名字
- top_service.setServiceParent(application) #把服务容器丢到应用中去
一些自己定义监控程序是否存活的脚本:
- program = {\'nginx\': [\'/opt/nginx/logs/nginx.pid\', \'/opt/nginx/sbin/nginx\'],
- \'rsync-C\': [\'/var/run/rsyncd.pid\', \'rsync --daemon\'],
- }
- def main():
- for k in program:
- a = get_pid(k, program[k][0])
- if isinstance(a, tuple):
- print \'%s is not running!\' % k
- print \'Start the program by Horland_guardian!\'
- subprocess.call(program[k][1], shell=True)
- else:
- print \'The %s is running!\' % k
- def check_alive():
- l_lived = []
- l_downed = []
- for k in program:
- a = get_pid(k, program[k][0])
- if isinstance(a, tuple):
- l_downed.append(k)
- else:
- l_lived.append(k)
- process_alived = \' \'.join(l_lived)
- process_down = \' \'.join(l_downed)
- return \'::\'.join([process_down, process_alived])
django的使用眼下仅仅须要使用到admin模块就能够。
以下是一些代码段:
model
- class BasicInfo(models.Model):
- ipadd = models.IPAddressField(verbose_name = u\'IP地址\')
- time = models.CharField(max_length=50, verbose_name = u\'时间\')
- cpu = models.CharField(max_length=255, blank=True, verbose_name = u\'CPU%\')
- cpu_detail = models.CharField(max_length=255, blank=True, verbose_name = u\'CPU详情\')
- mem = models.CharField(max_length=255, blank=True, verbose_name = u\'内存%\')
- mem_detail = models.CharField(max_length=255, blank=True, verbose_name = u\'内存详情\')
- disk = models.CharField(max_length=255, blank=True, verbose_name = u\'磁盘%\')
- disk_detail = models.CharField(max_length=255, blank=True, verbose_name = u\'磁盘详情\')
- net = models.CharField(max_length=255, blank=True, verbose_name = u\'流量 bytes/s\')
- net_detail = models.CharField(max_length=1000, blank=True, verbose_name = u\'流量详情\')
- tcp = models.CharField(max_length=255, blank=True, verbose_name = u\'tcp连接状态\')
- process_down = models.CharField(max_length=255, blank=True, verbose_name = u\'DOWN-进程\')
- process_alived = models.CharField(max_length=255, blank=True, verbose_name = u\'Process_UP\')
- def Process_DOWN(self):
- return \'<span style="color: #%s;">%s</span>\' % (\'ff0000\', self.process_down) #拓机的进程用红色标识
- Process_DOWN.allow_tags = True
注冊到admin
- class BasicInfo_admin(admin.ModelAdmin):
- list_display = (\'time\', \'cpu\', \'cpu_detail\', \'mem\', \'mem_detail\', \'disk\', \'disk_detail\', \'net\', \'net_detail\', \'tcp\', \'Process_DOWN\', \'process_alived\')
- list_filter = (\'ipadd\', )
- admin.site.register(BasicInfo, BasicInfo_admin)
freemind整理的思路中另一些功能没有实现。眼下这个仅仅能算个简单的demon吧,可是基本实现了监控的目的。欢迎大家给我留言!
以下上个django的admin界面截图吧!
代码下载
http://download.csdn.net/detail/qcpm1983/7611579
版权声明:本文博客原创文章。博客,未经同意,不得转载。
###sample
freemind思维导图打开以后,同时也打开早前,打开过的,其他思维导图文件,为什么会同时打开其他
windows用户安装时注意事项
办法1(适合计算机和英语水平较高用户):下载原始的FreeMind(9MB)进行安装。安装过程中会检查Java,如果你的计算机没有Java,它会提示先安装Java。
办法2(适合普通用户):安装ShareMind(38MB),你可以把ShareMind理解成加工过的FreeMind,更成熟,更易用,不再需要单独安装Java。
1、首先将在该页任选一地址将FreeMind(思维脑图)软件包下载至本地,并解压运行包内安装程序。如下:
2、直接单击【next】进入FreeMind(思维脑图)安装协议界面,了解协议内容并同意才可继续安装。同意选“i accept the...”

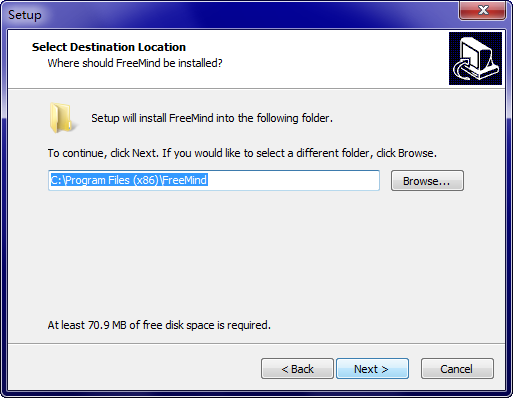
3、选择【next】
4、继续【next】
5、最后,FreeMind(思维脑图)安装完成单击【finish】即可开始体验。

FreeMind(思维脑图)使用教程
如何使用Freemind?
1、打开FreeMind(思维脑图),选择【文件】——【新建】创建一个新思维导图。
2、选择鼠标双击创建的主题,修改自己喜欢的名字。
3、选中这个主题并回车添加新的分支,并命名。依次选中某个分支回车即可创建新的分支。
4、如果你想添加子主题,请选择菜单——插入,或是快捷键insert。
5、最后添加需要的主题内容,如图片、链接、等信息。
注意:插入图像前,需要先保存文件。
6、如果你愿意还可以修改下导图样式,选择【格式】然后修改需要的节点颜色、节点样式、节点字样等信息。
7、修改后倒入需要的图效果如下:是不是比较比较醒目。
FreeMind(思维脑图)常见问题
一、FreeMind如何拖动节点?
1、选择新建思维导图,然后编辑需要的文字信息。
2、选中主节点回车,创建一个子节点编辑文字信息。
3、然后根据提示将鼠标直接悬放在主节点与子节点连接处,等鼠标的箭头改变后单击按住开始拖拽。
4、拖动节点后效果如下:
5、无法直接多个思维中心点展开,少量中文输入法无法在 FreeMind 输入启动及运行速度较慢。
二、Freemind软件在编辑中如何换行?
1、需要换行时,选择“编辑长节点”,再按“Enter”键来换行
三、freemind思维导图软件如何插入图片?
1、在节点上按Alt+K键,弹出文件框,选取你要插入的图片,点打开,就能得到图片了。
四、FreeMind 0.9x在P菜单中文字体过小。
解决办法:
1.推荐:从Windows入手:桌面→右键→显示属性→外观→高级项目。选择「菜单」(也可直接点击图像的对应位置),可以看到WinXP的字体默认是Tahoma 8,将字号改为9即可。OpenOffice的此类问题亦可解决。据称,Windows 2000不需要此设定。
2. FreeMind更换外观:菜单→工具→首选项→外观→外观感觉。更换为其他外观,比如Gtk等。
3. FreeMind更换语言:关闭FreeMind,在 c:Documents and SettingsuserID.freemindauto.properties 中加入一行 "language = en",重启后即为英语。
XMind 与 FreeMind 的对比有什么不同之处?
分析基于Windows平台下的 FreeMind 0.90 RC3 和 XMind 3.03,结合XMind开发者所提供的信息。基本结论是:FreeMind更为强大,XMind更为华丽,XMind 与 FreeMind各有优缺点,适用于不同的人群使用。
1、相同/相通之处
- 都是免费、开源、基于 Java。
- 都满足绘制思维导图的基本甚至高级功能。
- 相通之处:XMind 可以导入/导出 FreeMind 格式,但有些FreeMind输出的文件XMind不能读取;而FreeMind不能导入/导出XMind格式。
2、XMind更适合于其它结构图的制作
XMind在种类结构图方面比较注重,小伙伴们可以选择不同的结构图展示自己思维导图。如鱼刺图、逻辑图、二维图等。
3、FreeMind: 根点仍可插入父点
这点XMind就无法完成了,FreeMind工具可以在做好图的根节点新添加节点,该功能对某些小伙伴们可能比较适用。
如果小伙伴们想要体验XMind工具请在该处获取链接地址:http://www.onlinedown.net/soft/56160.htm
###sample 1
步骤1: 设计
步骤2:
实际存储过程如下:
create or replace procedure filesystem_check
as
vhost VARCHAR2(120);
vname VARCHAR2(120);
vkey VARCHAR2(120);
v_numdays number;
vtotal_begin_size number;
vfree_begin_size number;
vused_begin_size number;
vtotal_end_size number;
vfree_end_size number;
vused_end_size number;
vfs_growth number;
v_count number;
vfs_estimated_day number;
e_count number;
vfs_GROWTH_PER_DAY number;
vfree_percent number;
cursor v_cur is select * from (select host,name,regexp_replace(ltrim(key,\'vfs.fs.size[\'), \',pfree]\', null) key_new,free_percent from fs_percent where free_percent <35 and time=to_char(sysdate,\'yyyy-mm-dd\'));
begin
FOR v_rec in v_cur LOOP
/* DBMS_OUTPUT.PUT_LINE(v_rec.db_name||\' db_name\');
*/
DBMS_OUTPUT.ENABLE(buffer_size => null);
vhost := v_rec.host;
vname := v_rec.name;
vkey := v_rec.key_new;
vfree_percent := v_rec.free_percent;
DBMS_OUTPUT.PUT_LINE(vhost||\' host \');
/*end loop;
end;*/
select count (* ) into e_count from fs_size where host=vhost and key like \'%\'||vkey||\'%total%\' and time=to_char(sysdate -3,\'yyyy-mm-dd\');
if e_count > 0 then
select max(size_g) into vtotal_begin_size from fs_size where host=vhost and key like \'%\'||vkey||\'%total%\' and time=to_char(sysdate-3,\'yyyy-mm-dd\');
DBMS_OUTPUT.PUT_LINE(vtotal_begin_size||\' vtotal_begin_size \');
DBMS_OUTPUT.PUT_LINE (\'peng\');
select max(size_g) into vfree_begin_size from fs_size where host=vhost and key like \'%\'||vkey||\'%free%\' and time=to_char(sysdate-3,\'yyyy-mm-dd\');
DBMS_OUTPUT.PUT_LINE(vfree_begin_size||\' vfree_begin_size \');
select max(size_g) into vused_begin_size from fs_size where host=vhost and key like \'%\'||vkey||\'%used%\' and time=to_char(sysdate-3,\'yyyy-mm-dd\');
select max(size_g) into vtotal_end_size from fs_size where host=vhost and key like \'%\'||vkey||\'%total%\' and time=to_char(sysdate,\'yyyy-mm-dd\');
select max(size_g) into vfree_end_size from fs_size where host=vhost and key like \'%\'||vkey||\'%free%\' and time=to_char(sysdate,\'yyyy-mm-dd\');
select max(size_g) into vused_end_size from fs_size where host=vhost and key like \'%\'||vkey||\'%used%\' and time=to_char(sysdate,\'yyyy-mm-dd\');
vfs_growth := vused_end_size - vused_begin_size;
v_numdays := 3;
vfs_GROWTH_PER_DAY := round((vfs_growth/v_numdays),2);
DBMS_OUTPUT.PUT_LINE(vfs_growth);
if vfs_growth > 0 then
vfs_estimated_day := round((vfree_end_size)/round(vfs_growth/v_numdays,10),2);
else
vfs_estimated_day := 999999;
end if;
DBMS_OUTPUT.PUT_LINE(CHR(10));
DBMS_OUTPUT.PUT_LINE(\'--------------------\');
DBMS_OUTPUT.PUT_LINE(\'---------------------------\');
DBMS_OUTPUT.PUT_LINE(CHR(10));
DBMS_OUTPUT.PUT_LINE(\'Summary\');
DBMS_OUTPUT.PUT_LINE(\'========\');
DBMS_OUTPUT.PUT_LINE(\'1) Allocated Space: \'||vtotal_end_size||\' GB \');
DBMS_OUTPUT.PUT_LINE(\'2) Used Space: \'||vused_end_size||\' GB\');
DBMS_OUTPUT.PUT_LINE(CHR(10));
DBMS_OUTPUT.PUT_LINE(\'History\');
DBMS_OUTPUT.PUT_LINE(\'========\');
DBMS_OUTPUT.PUT_LINE(\'1) Allocated Space on \'||\'3 days ago \'||\': \'||vtotal_begin_size||\' GB\');
DBMS_OUTPUT.PUT_LINE(\'2) Current Allocated Space on \'||\' today \'||\': \'||vtotal_end_size||\' GB\');
DBMS_OUTPUT.PUT_LINE(\'3) Used Space on \'||\'3 days ago \'||\': \'||vused_begin_size||\' GB\' );
DBMS_OUTPUT.PUT_LINE(\'4) Current Used Space on \'||\' today \'||\': \'||vused_end_size||\' GB\' );
DBMS_OUTPUT.PUT_LINE(\'5) Total growth during last 3 days between \'||\': \'||vfs_growth ||\' GB\');
DBMS_OUTPUT.PUT_LINE(\'5) growth per last 3 days between \'||\': \'||vfs_GROWTH_PER_DAY ||\' GB\');
insert into fs_est values ( vhost,vname,to_char(sysdate,\'yyyy-mm-dd\'),vtotal_begin_size,vfree_begin_size,vused_begin_size,vtotal_end_size,vfree_end_size,vused_end_size,vfs_growth,vfs_estimated_day,vfs_GROWTH_PER_DAY,vkey,vfree_percent);
END IF;
DBMS_OUTPUT.PUT_LINE(\'/\/\/\/\/\/\/\/\/\/\/\/ END \/\/\/\/\/\/\/\/\/\/\/\\');
DBMS_OUTPUT.PUT_LINE(\'---------------------------\');
DBMS_OUTPUT.PUT_LINE(CHR(10));
DBMS_OUTPUT.PUT_LINE(\'/\/\/\/\/\/\/\/\/\/\/\/ END \/\/\/\/\/\/\/\/\/\/\/\\');
END LOOP;
COMMIT;
END;