Xshell是Windows下一款功能非常强大的安全终端模拟软件,支持Telnet、Rlogin、SSH、SFTP、Serial 等协议,可以非常方便的对linux主机进行远程管理。
1、OpenSSH更改默认端口
(1)、主配置文件:/etc/ssh/sshd_config
[[email protected] ~]# vim /etc/ssh/sshd_config
port 22 # 改成2222
(2)、重新启动服务
systemctl restart sshd.service
(3)、查看端口
   [[email protected] ~]# ss -tnl
   State   Recv-Q Send-Q Local Address:Port   Peer Address:Port
   LISTEN     0    128   *:2222         *:*
   LISTEN     0    128   :::2222         :::*
(4)、登录测试

   Connecting to 172.16.38.3:2222...
   Connection established.
   To escape to local shell, press 'Ctrl+Alt+]'.

   WARNING! The remote SSH server rejected X11 forwarding request.
   Last login: Thu Jan 21 21:37:57 2016 from 172.16.38.1
   [[email protected] ~]#
(5)、在已经登陆的其他终端直接登录到172.16.38.3
    [[email protected] ~]# ssh -p 2222 172.16.38.3
    [email protected]'s password:
    Last login: Thu Jan 21 21:57:19 2016 from 172.16.38.3
    [[email protected] ~]#
2、scp复制(两种)
本地主机为172.16.38.3 远程主机为172.16.38.4
(1)、PULL-------从远程主机上获取资源,前提远程主机的资源可读
    [[email protected] ~]# scp -r [email protected]:/var/www/* /root/
    [email protected]'s password:
    index.html     100%   72     0.1KB/s   00:00
    index.php      100%   21     0.0KB/s   00:00
    configure.sh    100%   49     0.1KB/s   00:00

    [[email protected] ~]# ll
    total 4
    -rw-------. 1 root root 1084 Jan 20 04:22 anaconda-ks.cfg
    drwxr-xr-x  2 root root    6 Jan 21 22:05 cgi-bin #复制过来的
    drwxr-xr-x  3 root root   52 Jan 21 22:05 html  #复制过来的
(2)、PUSH-------从本地主机复制给远程主机,前提远程主机的目录可写
    [[email protected] ~]# scp anaconda-ks.cfg [email protected]:/tmp
    [email protected]'s password:
    anaconda-ks.cfg   100% 1084     1.1KB/s   00:00

    在172.16.38.4远程主机的/tmp目录查看
    [[email protected] tmp]# ls
    anaconda-ks.cfg
3、基于**认证的实现
a、在xshell工具生成一对密码:


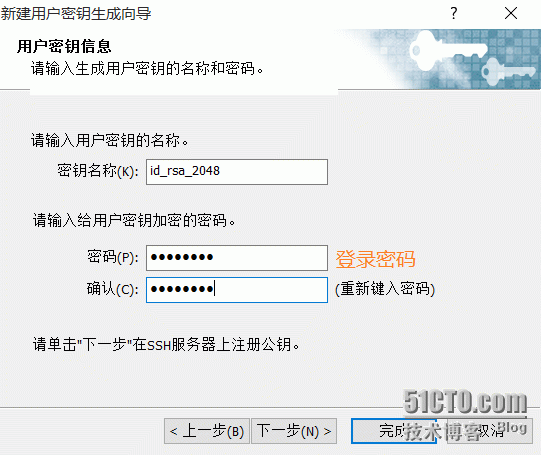
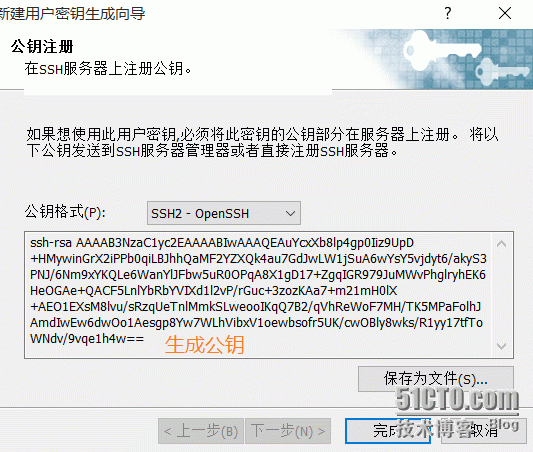

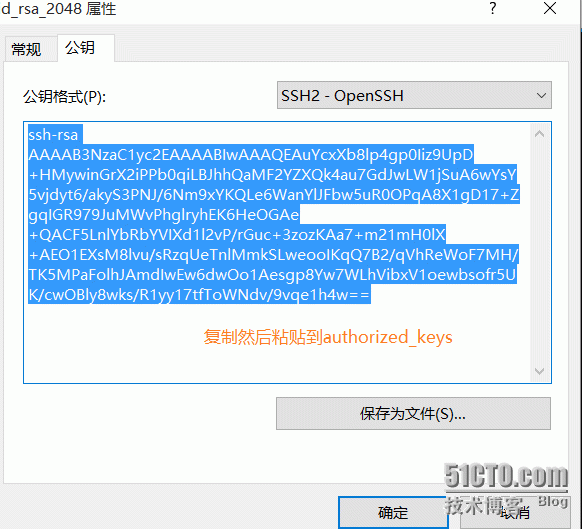
4、要登录的Linux主机中配置:
配置文件:/etc/ssh/sshd_config
# The default is to check both .ssh/authorized_keys and .ssh/authorized_keys2
# but this is overridden so installations will only check .ssh/authorized_keys
AuthorizedKeysFile      .ssh/authorized_keys
[[email protected] ~]# chmod 700 .ssh
[[email protected] ~]# cd .ssh
[[email protected] .ssh]# ls
known_hosts
[[email protected] .ssh]# vim authorized_keys

[[email protected] .ssh]# ll
total 8
-rw-r--r--. 1 root root 381 Jan 21 22:55 authorized_keys
-rw-r--r--. 1 root root 180 Jan 20 21:28 known_hosts
[[email protected] .ssh]# chmod 600 authorized_keys
[[email protected] .ssh]# ll
total 8
-rw-------. 1 root root 381 Jan 21 22:55 authorized_keys
-rw-r--r--. 1 root root 180 Jan 20 21:28 known_hosts
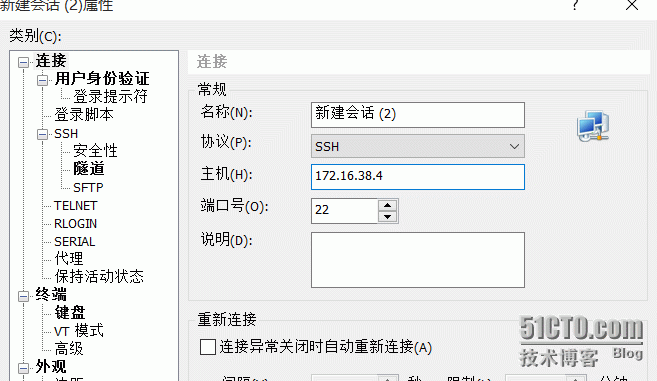

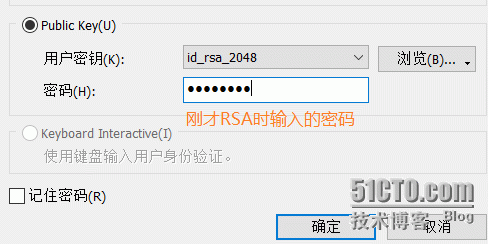
登录成功
Connecting to 172.16.38.4:22...
Connection established.
To escape to local shell, press 'Ctrl+Alt+]'.

WARNING! The remote SSH server rejected X11 forwarding request.
Last login: Thu Jan 21 23:07:09 2016 from 172.16.38.1
[[email protected] ~]#
转载于:https://blog.51cto.com/liguoqing/1737496